Ricotta, yogurt and cherry ripple ice cream (or: reasons why South East London rocks)

HL_cherryicecream

We have little shops selling fresh ricotta, lovely neighbours with generous cherry trees, and we are a safe distance away from chaotic central London. These are some of the many reasons why South East London rocks.

HL_sievedricotta_1


Like most people living in London for more than 5 minutes, I have it as a rule to avoid Oxford Street and its noisy crowds, dreadful traffic, visual pollution and generally irritating surroundings. During the Summer months, that rule becomes an amber alert, taking into consideration the tourist population, and my pathological lack of patience with slow pedestrians hogging the pavement. Last Saturday, I had to make an exception for a very good reason: a new Kitchenaid! My mum decided she wanted to buy me one, and as the good daughter that I am, I gratefully accepted it. Selfridges had a sale on, and seemed to offer the best price, and so I headed to the more salubrious end of Oxford Street to see those babies in person and be sure to pick the right colour. Of course I had forgotten it was Pride Parade day, the traffic was twice as bad, half of Oxford street was closed off even for pedestrians, and it took me two hot, sweaty, sweary, nervy hours to emerge at the other end and smell the sweet air of Selfridges. Feeling immediately soothed by the kitchen department, I decided I could still do with a glass of something and some slices of San Danielle ham, and another glass of something else … well, before I knew it, I was cutting it short to make it back for the Brazil match.

Which is why, in my rush, I nearly missed the 1950s moment happening right on my doorstep as I rushed back home (through a much smarter and faster route, caring a bit less anyway after my hefty aperetif session).

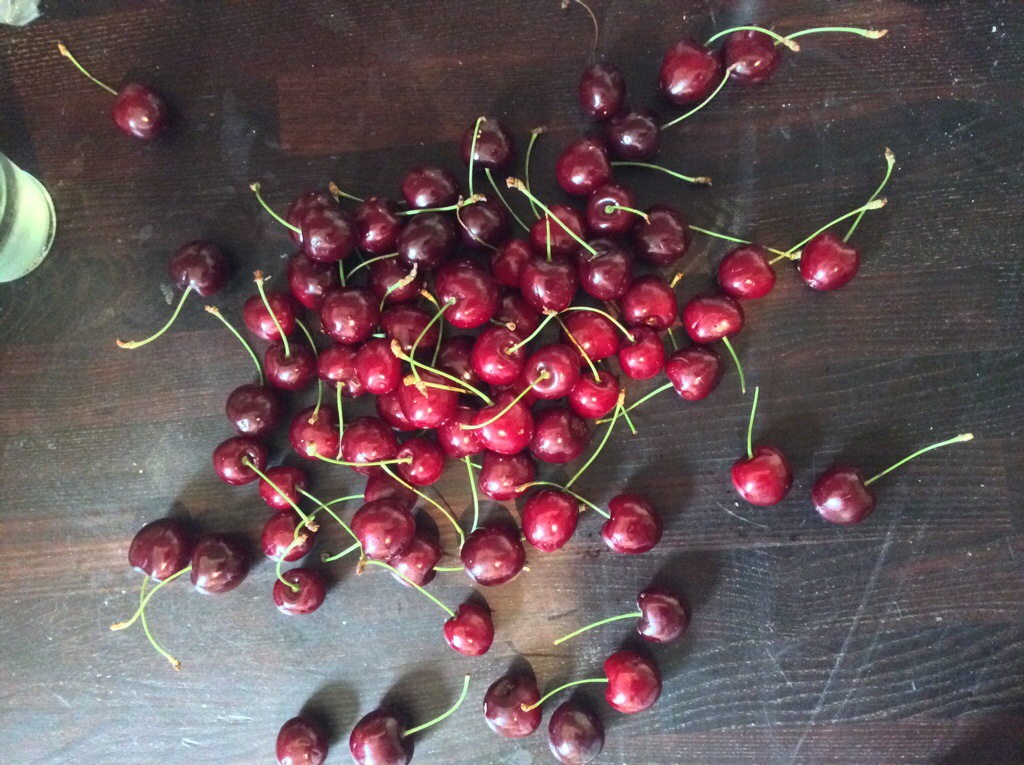
Who doesn’t love a lemonade stall sort of enterprise? A bunch of kids selling the produce of their garden cherry tree, a pound a bag. Their mums were overseeing the operations, chatting away to neighbours. Total food miles: zero.

HL_cherries_bloody2


I quickly started on a bag, but had to stop myself choking on a pit, as I screamed and pleaded with Brazil to get a move on as we hung to the world cup by the skin of our teeth.

20140629-185329-68009774.jpg

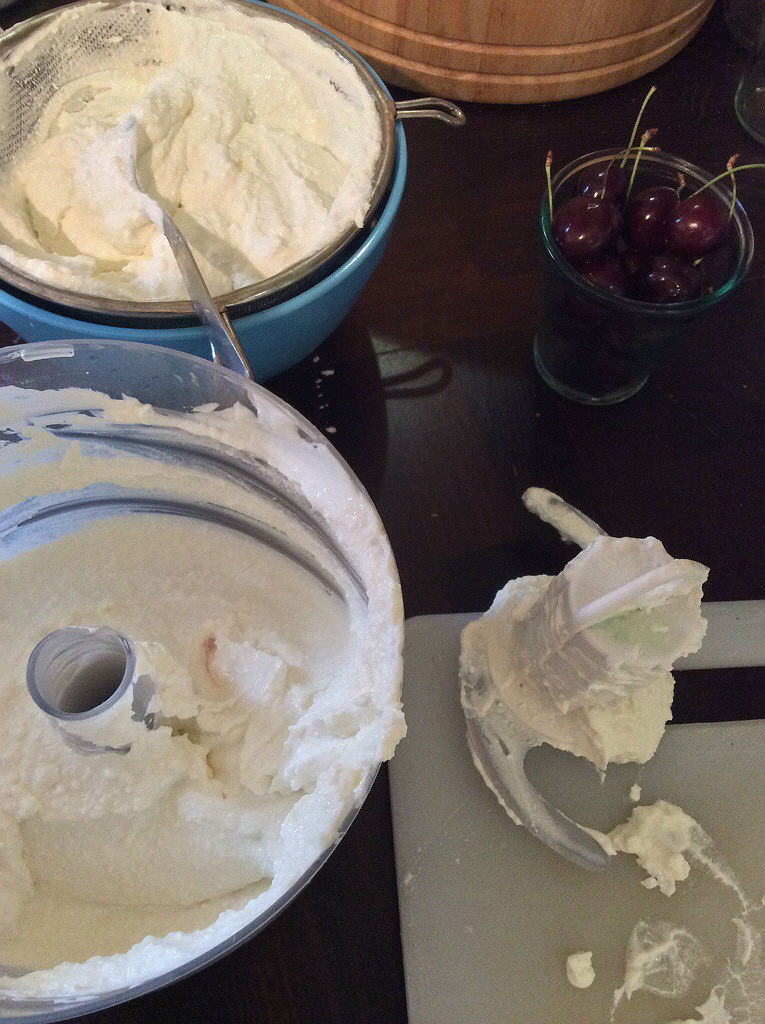
Next day, my cherry project took shape as I was buying some ricotta for dinner. I could eat ricotta for days on end, and the same goes for Greek yogurt. I was looking at both of them in the shop, and wondered what frozen yogurt would taste like if I mixed some ricotta into it. And than added a ripple of cherry jam.

HL_frozenyogurt1

Let me tell you what happens: you end up with creamy, rich frozen yogurt,  with juicy bits of thick sticky cherry running through it. I found some creme de cassis and added to the cherry jam. I’m not entirely sure how child friendly this makes my frozen yogurt, but I took some back to the cherry mums, and they seem happy enough with it.

IMG_4203

Three cheers to Catford and our cherry trees!

20140629-185330-68010357.jpg

Cherry ripple ricotta frozen yogurt

Cherries will forever taste foreign and northern-hemisphery to me. As for frozen yogurt, they may be a bit 90s, but I never got over them. What’s not to like? Fatty yogurt, turned into ice cream? The creme de cassis completes the nostalgic 90s theme.

For the cherry jam:

  • 500g/just over 1lb pitted cherries
  • 65g/ 1/3 cup light brown sugar
  • 1 tbsp golden syrup
  • Half a lemon
  • Pinch of salt
  • A dash of creme de cassis (optional, or other liqueor to taste)

For the ice cream:

  • 1 kg / 3.5 cups full fat greek yogurt
  • 500g /1 cup fresh unsalted ricotta
  • Half a lemon
  • 3 tbsp caster sugar

Make the jam:
Pit and roughly chop the cherries.
In a heavy saucepan, add the cherries and the rest of the ingrdients, bring it to a boil, and let it cook in medium heat for about 30 minutes until you have a thickish jam. Let it cool completely.

Make the frozen yogurt:
In a blender, blitz all the ingredients until smooth.
Press the yogurt – ricotta mix through a sieve so it’s not too bitty.
If you have an ice cream maker, follow the manufacturer’s instructions from here.
I don’t have one (mother?), and here’s what I’ve done:
Place the mixture into a non metallic container and take it, uncovered, to the freezer. Leave it an hour and mix it with a fork, making sure there are no crystallised bits. Mix it again an hour later. Wait one more hour, and this time add the cooled jam to it and mix it as much or as little as you like. I made mine reasonably pink, but still left it a bit streaky. Leave it in the freezer for another hour, and it’s ready to serve. If you leave it overnight, remove it from the freezer about 30 minutes before serving. It should be creamy, but not melting.

My little catfordian kitchen: cooking with rachel khoo

ANT_5119

I was sipping a dubious cappuccino on the train to work last Tuesday when this landed in my inbox: “Hi, Renata, this is Anna. How would you like to come over and cook with Rachel Khoo words words words words recipes from her new show words words photos for your blog some more words and noise sit down for dinner?

At least these were the keywords that jumped up right in from of me before I rushed to hammer my reply:

“Dear Anna. Hell, yeah!”

And then I carried on with my day, told approximately 250 people I’d be hanging out with Ms Khoo, and eventually went back to the email, which is when I spotted some additional words that I swear were not part of the original text I’d seen that morning: the whole thing would be filmed and released in time for Rachel Khoo’s new cooking show on UK Good Food Channel this month. You see, I dislike cameras. They dislike me. It’s just not happening for me and cameras. I tend to freeze, panic and babble incoherently every time one of those intrusive weapons points at me.

After much fretting, the eternally wise Vegetarian Spouse reminded me to get a grip, get over myself and get on with it. Yet again, I am glad I listened to him. I got to meet a bunch of talented bloggers, had a great time cooking, and found out about Rachel Khoo’s favourite secret places in Paris.

When Rachel Khoo first appeared on people’s radar a few years ago with her Little Paris Kitchen show on BBC2, the tale of a Londoner feeding Parisians on their own turf was quickly snatched up as a great success story. What I really like about her is that  she is a complete self-starter. She went and set herself up as a pastry chef in Paris, used the tiny space in her flat to run her petit supper club, pitched her books to publishers and knocked on producers doors with her idea until she got a deal. She is vocal about the rotten deal female chefs get from television producers. She has a point. Looking at the very Good Food Channel page, hosts of Khoo’s 2 new shows Kitchen Notebook: London and Cosmopolitan Cook (the rest of Europe), a gallery of 17 celebrity chefs has room for 6 women only.

chefs

On the Cook With Bloggers evening, my nerves were immediately soothed as I arrived: a couple of lovely smiles greeted me, and the words green room and prosecco uttered within 2 seconds of arrival. Here’s some of the highlights:

  • stepping into the set of Saturday Kitchen – complete with omelette fridge!
  • prosecco refills
  • Frankie: from what I could gather, she works closely with Rachel Khoo, and is to be credited with rescuing potential mishaps and forgetful moments. During the evening, Frankie’s voice was frequently heard with helpful reminders such as: ‘have you removed those onions from the oven?’, and ‘don’t use all the garlic at once!’. My message to Frankie is a simple one: if you’re willing to be remunerated in boozy brownies, I need you in my life.
  •  What a treat to find the exact ingredients measured and organised in neat bowls on my very own workstation!

What did we cook? A couple of recipes from Khoo’s new Kitchen Notebook show, none of which I had considered making before – again, a reminder of why it is important to give new opportunities a go. Khoo’s maternal side of the family is Austrian, and it is clear she’s been influenced by her grandmother’s cooking – and love of butter, a feature I identify so well with, my own Piedmontese nonna’s cuisine consisting of butter, garlic, and double cream. We tried our hands at Austrian Spatzle – pasta dumplings which I had thought was German – and Swedish Smorgastarta.

IMG_4009

The gossip: What’s Rachel Khoo like? Engaging, smart, funny, patient, really nice. And she clearly has control over her career. She talked passionately about what she enjoys in food, in television, and what she felt made a perfect restaurant (it was: homely food and a remote location).

IMG_4007

Dinner with other bloggers to taste the food we had cooked together was fun and loud, and very social. We all had our own questions for Khoo, but it was also a lot of fun to meet the real life versions of people I follow on Twitter, and for once not having to limit communication to 140 characters. The eater behind The Food Urchin blog has what can be described as a healthy appetite (very impressive progress on the smorgastarta, well done!), and I enjoyed cooking next to Leyla of The Cutlery Chronicles because once in my life I was the least distracted one! She is also very funny. The spatzle was, quite simply, a delicious dish. I won’t spoil it by sharing the recipe before the show is out. For this blog post, however, I have made an adapted bite sized version of the Swedish smorgastarta we cooked there. With massive apologies to Swedish people reading this, since I used oat cakes in place of Swedish flatbread. Consider it an homage to a Scandinavian classic.

IMG_4030

The next time I go to Paris, I can’t wait to visit Rachel Khoo’s secret little Vietnamese restaurant, complete with local ladies coming in and out of a trap door on the floor, hopefully to fetch me a tray of complimentary sweets.

Rachel Khoo’s Kitchen Notebook: London starts tonight on the Good Food Channel at 9 p.m. 


I attended this event as a guest of the Good Food Channel. I was not required to write a positive review, and the opinions I have expressed are my own.


IMG_4104

Oat Cakes Smorgastarta

Smorgastarta is a Scandinavian dish, somewhere between a large sandwich and a pie. I have made mine into  individual starter portions, and have used oat cakes in place of the more commonly used rye bread or Swedish flatbread. Yes, oat cakes are drier, but I love them, and it gives me the perfect excuse to use twice as much cream and filling. It requires very little effort, but some planning ahead, mainly to coll down the brine to cure your salmon.

For 2 starter portions:

Ingredients:

  • 6 oat cakes
  • 200ml double cream
  • 100ml soured cream
  • 1 tsp horseradish
  • 50g fillet raw salmon
  • 1 cucumber
  • 2 beetroots
  • 1 clove of garlic
  • 1 tbsp black peppercorns
  • 1/2 tbsp juniper berries
  • 1 tsp caster sugar
  • a handful of dill, chopped
  • a handful of parsley, chopped
  • salt and pepper

Prepare a  brine to light cure the salmon:

Fill a small saucepan with 250 ml water, add the peppercorns, juniper berries, sugar and salt.

Peel 1 raw beetroot, chop it up and add it to the water. Bring it to the boil and let it cook in medium heat for a minute or two.Transfer it to the fridge and let it cool down completely. If too warm, you risk cooking the salmon in the water.

Prepare the filling and toppings:

Cook the other beetroot in water and leave it to cool. When cool, peel and slice or dice the beetroot. I sliced it thinly with a mandolin so it matched the salmon looks.

Using a sharp knife, mandolin or vegetable slicer, cut ling thin slices of cucumber. Depending on the length, you will need about 4 slices for 2 cakes.

If you have a tiny melon baller, cut out little cucumber ‘pearls’, about a handful per cake. I used the smallest (1/8 tsp) measuring spoon I had to do this.

Take the piece of salmon and slice it thinly. Allow 3 to 4 slices per cake. Add the slices to the bowl of cool brine and let it cure for at least 15 minutes.

Blitz the remaining salmon and sour cream in a food processor. Add salt and pepper to taste, and add more sour cream if needed. You need it to be not too runny so it stays put in between layers of oat cakes.

Whip the double cream until firm. Add a teaspoon of horseradish, and about 3 tablespoons of sour cream to it. Aim for a firm enough frosting.

Assemble the cakes:

Make a 3 layer sandwich with the oat cakes and creams: one oat cake – a good layer of sour cream-salmon mix – oat cake – sour cream-salmon – oat cake. Top it up with the double cream-sour cream mix. Frost the side of the cakes with the double cream-sour cream mixture.

Wrap the sides of the cake with the cucumber slices.

Top it up:

Arrange a few slices of salmon, the cooked beetroot, cucumber pearls and herbs on top of the cake.

Serve as a starter with a watercress salad.


Rice fritters

HL_bolinhodearroz2


The term peasant food can be overused, and is often an affectation to evoke a bygone era of happy working folk eating simple, nutritious food that has cleverly been discovered as a culinary treasure. Peasant and food put together tends to annoy me a lot. It just feels fake.

And yet these rice fritters, which invariably gain a devoted crowd when I serve them, are genuinely the stuff of everyday lunch in Brazilian homes – peasant or not.

Brazilians, like most Latin Americans, eat A Lot of rice and beans. It really is everywhere, every day, at every meal. It’s no surprise crafty cooks would have found ways to use leftovers of both – bean soup and bean broth being other frequent presence on end-of-week dinners.

As a pre-starter choice in the supper club, these fritters are a complete sell out. If you want to really look the part, call them Bolinho de Arroz and start making those caipirinhas.

You’ll find all sorts of variations of this recipe, most with plain flour, and some debate on whether or not to add milk to the mix. I like to use breadcrumbs in place of plain flour, and no milk. This ensures a crispy first bite, and a soft inside, free from sogginess or oil.

HL_bolinhodearroz7

As for the rice, use whatever next day rice you happen to have lying around. The only exception is risotto. The Italians have perfected their arancini, and it’s a good idea to save your leftover risotto for that. It won’t work so well in this recipe. American long grain, basmati, white, jasmine, it’s all fine. Next time you over order on your Indian takeaway, save the rice for this.

At the Eurovision supper club earlier this month, I made mejadra, a dish of white rice, lentils and onions to share. It went down very well, but we still brought some back home. This is what I used here. Rice and lentils, plenty of spices, quite a lot of onions. Once fried, I made a couple of dips to go with it: a sort of salsa verde with coriander, anchovies and lime, and a yoghurt sauce. Since I’m currently going through the phase of adding dukkah to everything I eat, a sprinkle of that on the rice cakes gave a very welcome final touch. I was given a jar of this spice and nuts mix by a friend who’s gone up several points in my good books since. I suspect there will be many variations of this North African mix. So far, I could detect cumin, semame seeds, oregano and chickpeas in mine.

IMG_3838

The plan was to make a large batch of them and freeze some. That didn’t happen. The freezer is looking quite empty and desolate at the moment.

If you have any Turkish or middle eastern shops near you, it’s worth looking for labneh, which is a strained yoghurt, of thick consistency and quite sharp taste. Failing that, greek yoghurt works too, although it is more mild and sweet, and I’d add some lemon or lemon to it for tartness.

Rice fritters

  • Leftover rice: 4 cups. Long grain, basmati,  easy cook  all work well. Don’t use letfover risotto in this recipe. Save those for arancini.

(if you’re making rice especially for this recipe: prepare the rice one full day ahead and follow the instructions at the bottom of this recipe*)

  • 1/4 to 1/2 cup fine breadcrumbs
  • 1/2 tbsp baking powder
  • 1/2 cup grated parmesan
  • 1/2 cup chopped parsley
  • 3 spring onions, finely chopped, including the green bits
  • 4 eggs
  • salt and pepper
  • Plenty of vegetable oil to fry. I used just under a 1 litre bottle of grapeseed oil. Corn or sunflower oil will work fine too.
  1. Beat the eggs a little bit with a fork in a small bow. Mix all ingredients  – minus the oil! – in a large bowl, starting with 1/4 cup of breadcrumbs. Add the eggs.
  2. The best way to check if the dough is right is to get your hands dirty. Mix it all together with your hands, adding more breadcrumbs if necessary.  You should be just able to roll up the rice cakes, leaving your hands still quite messy and sticky. Taste for salt and pepper.
  3. Heat the oil up in a large frying pan. Allow about 5 cm (2 in) of oil, just enough to cover the cakes. When the oil is very hot, turn the heat down to medium-high and fry the rice cakes in batches, taking care not to overload the pan, as this will bring the oil temperature down and compromise the crunchiness of the cakes. Turn the cakes around until they’re a nice golden colour all over, which should take about a minute. Remove the cakes from the frying pan and let them rest on kitchen towel.

Dips:

1. Yoghurt: mix labnheh or preferred yoghurt with chopped parsley, one crushed clove of garlic, salt, pepper and a squeeze of lime.

2. green sauce: chop 3 handfuls of coriander, leaves and stem. Mix it in a small bowl with 4 – 5 crushed salted anchovies fillets, plenty of olive oil, a squeeze of lime, salt, pepper, and 1/2 small red chilli, chopped.


*If you’re making rice especially for this recipe:

  • 2 cups uncooked rice
  • 1 onion, chopped
  • 1 clove garlic, chopped
  • salt
  • 1 litre preferred stock
  • vegetable oil (not olive oil)
  1. Warm up 3 tbsp oil and add the chopped onions. Mix well and fry for about 5 minutes on medium – low heat until soft and translucent. Add the garlic and fry for another minute, taking care not to burn the garlic.
  2. Add the rice and mix it well for about a minute to make sure the rice is well coated with the oil and onions.
  3. Add the boiling stock. Use enough to cover the rice by about 3 cm (just over 1 in). Lower the heat to low-medium, half cover the pot and let it cook for about 12 to 15 minutes, until the water is evaporated. Taste the rice, and if it’s done before all the water is gone, turn the heat off and drain. If the water is gone and the rice is not yet done, add a bit more of boiling stock or water.
  4. Wait until the rice has reached room temperature, put it in a sealed container and place it in the fridge for 24 hours when it’s ready to use for the fritters.

HL_bolinhodearroz5


Happy Easter with chocolate and coconut bites

HL_prestigio

This is a tale of redemption. The lesson here is: when life gives you chocolate and coconut, put them together. Because it’s a match made in sweet heaven.

I started last week with a clear image of a happy Easter egg assembly line in my kitchen. My plan was a simple one, and seemingly a winner: home made Easter eggs made of two thin layers of milk chocolate, and a creamy coconut paste in between them. An Easter egg Bounty bar, if you will.


And then a succession of failures ensued. The picture inside my head was quickly shot down by reality. The pile of coconuts I had planned to grate yielded a bunch  of dried, brown, foul smelling pulp that went straight to the bin. And Easter egg moulds proved to be the most difficult kitchen item to procure in the history of the world. By the time I resigned myself to the fact that no shop in the UK was prepared to sell me chocolate moulds – they’re either discontinued, or require a purchase no later than Christmas to guarantee delivery by Easter – I had a large bowl of delicious creamy coconout in my hands. Yes, because shredded coconut made an excellent alternative to the fresh stuff.

IMG_3667

IMG_3636

And so I finally let go of the original Easter egg idea, and instead had an enormous amount of fun melting chocolate and turning them into coconut-chocolate bars. This was not the fancy, exclusive chocolatier boutique sort of bar. Yes, they taste moreish and delicious. But they look far from perfect and pristine, and since it is Easter, I decided to dress them in not exactly the most elegant or sober packaging. After all, Easter eggs are like chocolate in drag. I made mine into small morsels and wrapped them in colourful tissue tied up with ribbon. And I am now sitting here praying the weather will hold, as there are dozens of these things spread around the garden, ready for tomorrow’s Easter egg hunt.

Happy Easter!

IMG_3675


Post-Easter update: the chocolate disappeared in record time. I thoroughly recommend this if you’re looking for an instant crowd pleaser.

IMG_3680

HL_cocochoc

Chocolate coconut bites

The first step in this recipe should read: Move to a tropical country. Sadly, the coconuts I managed to find in London were no good. The alternative was very good, and I ended up with a moist coconut paste that carried a lot of flavour. If possible, look for packets of flaked, instead of dessicated coconut. There’s more moisture and flavour in them. I then shredded them finely in a food processor. The coconut paste is incredibly tasty on its own, and I’d advise you to make a little extra, as several spoonfuls seemed to mysteriously disappear in the making of this.

As for the chocolate, I went for milk, as the kids I was making this to prefer it. I like Green&Black’s for an easily available, reasonably priced, good quality chocolate. Choose the chocolate you prefer, and go for a really fancy one for a treat – and if you’re not feeding a bunch of famished kids!

makes about 50

  • 300g fresh coconut, grated. Or 300g flaked coconut. I used Neal’s Yard one.
  • 300g caster sugar
  • 300ml full fat milk
  • 500g milk chocolate

Make the coconut paste:

Put the coconut (fresh or flaked) into a food processor and shred it finely.

Mix shredded coconut, milk and sugar in a medium sized, heavy bottomed saucepan, and bring it to the boil. Continue to cook on medium heat for 20 to 25 minutes, stirring occasionally. Do not let it burn. It is ready when you can easily see the bottom of the pan as you stir it. You should end up with a thick porridge that doesn’t fall off the spoon as you turn it. Let it cool completely before using it.

Melting the chocolate: If you’ve never made chocolate, this step-by-step guide from the BBC Good Food pages is excellent. If you don’t have a kitchen thermometer, here’s a rough guide that will work well in this recipe:

  1. break 350g of the chocolate into chunks and process the remaining 150g finely in a food processor.
  2. place the 350g chocolate chunks into a bowl over simmering water, making sure the bottom of the bowl does not touch the water. Stir only a little bit, and when it is almost fully melted, remove from the heat. Reserve about 5 tbsp of the melted chocolate and keep it warm (keep it over the pan with hot water, but out of the heat).
  3. Add the 150g finely processed chocolate to the large portion of melted chocolate and stir until the whole lot is melted. Then add the bit of melted chocolate you set aside earlier. This should ensure the right temperature and you’ll end up with shiny, smooth chocolate.

Assembling the chocolate-coconut bites:

Grease your hands a little with butter. Take about a full teaspoon of coconut paste into your hands and roll it. Dip the coconut ball into the chocolate to coat it well, pick it up with a fork and let the excess fall into the bowl, then rest the final product on a sheet of parchment paper. Let it cook completely, ideally for a few hours until it has dried up well.

Wrap it up: I used a layer of foil for direct contact with the chocolate, and then wrapped tissue paper around the foil.

IMG_3689


Baba Ganoush


babaganoush

I have no idea what happened to winter.

All I know is that, after what felt like a decade of continuous rain, all of a sudden there are flimsy  dresses in the streets – it is England after all and people get carried away with a bit if sunshine.

With this year’s early onset of spring came an array of fresh vegetables we hadn’t seen for a while, and a craving for all things fresh. True, radishes are still looking a bit anaemic, and the stars of the show – strawberries, sweetcorn, peaches – haven’t shown up yet. Still, with the glorious sunshiny weekend we had, it was out with the melted cheese and in with the gin & tonic lemonade  and salads.

IMG_3347

Craving to cook something fresh and summery, I went for a stroll through Lewisham market in search of inspiration for dinner. Lewisham market is a curious place. Compared to its more genteel farmers’ markets neighbours, it could be described as ‘real’. It’s a great place to fill your fridge for the week for a fiver. As long as you’re planning to do some serious cooking. Some of the typical fare on offer include: a pound for 900 spring onions, or a bucket load of lemons, or approximately a lifetime’s supply of coriander. Don’t ask me how it’s all so incredibly cheap, but you do end up with some meal planning challenges. I tend to go with one of my neighbours, and we split the massive amounts of vegetables, or we’ll end up eating onion soup for a fortnight.

IMG_3421

On Saturday, I went a bit overboard on the aubergine, which really is a lovely problem to have. There isn’t a single variation of this most versatile vegetable that I don’t absolutely love. Parmiggiana,  caponata, battered aubergine, I’ll lap it all up. The undisputed king of aubergine dishes, for me, has to be baba ganoush – the smoked aubergine cream also known as one of the top 10 best dishes in the planet. So, with 2 and a half tons of aubergines on my hands, I set to roast those babies and stock up on dip.

IMG_3399

Baba ganoush is so simple to make, but it can be a bit off-putting because it looks fiddly and messy. It doesn’t have to be. Just have a very basic production line and you’ll have smokey, irresistible aubergine that goes wonderfully well with virtually every food – and a relatively tidy kitchen in the process. All you need is a few aubergines, some tahini – or sesame seed paste, widely available from middle eastern food shops or most supermarkets – , garlic, lemons and olive oil. As for herbs and spices, I’ve experimented a lot, and found I like to add more parsley than you’d normally see in original recipes, which explains why my baba ganoush looks a bit green. I also add a tiny pinch of cumin for the smokiness, but I suspect if you roast your aubergines on a barbecue (which I don’t – please refer to paragraph one: living in London), you wouldn’t need the cumin.

IMG_3380

For a quick dinner, you can use the 30 minutes while the aubergines are in the oven to get on with the rest of the meal. I used my Lewisham market bounty to make some roast cauliflower salad with lots of raddishes and a few of the 900 spring onions. Some grilled halloumi cheese, a bit of hummus to pair up with the baba ganoush, and we were set for spring!

IMG_3513

Johnny the cat is quite partial to a bit of babaganoush

IMG_3464

IMG_3479

His and hers hummus: mine has marinated neck of lamb on it.

IMG_3489

Baba Ganoush

This recipe uses quite a lot of parsley and the dip ends up pretty green. Use a bit less for a more authentic looking brownish baba ganoush. As for the garlic, I use a small one per large aubergine. It’s safer to start with 1 or less, and add more if needed. Too much garlic will ruin the aubergine taste. If you don’t have a gas fire, I think the only worthy alternative is a barbecue. Or a wood fired oven if you’re lucky enough to have one. Taking the aubergines straight into the oven without smoking them first, in my opinion, compromises the final taste too much and it’s not worth making it.

  • 4 aubergines
  • 4 (or less) small garlic cloves
  • half a lemon
  • about 3 tbsp extra virgin olive oil
  • 1/2 cup (120 ml) tahini
  • tiny pinch of ground cumin
  • a handful of chopped parsley leaves – more or less according to taste
  • salt and pepper to taste
  1. pre-heat the oven to 200C (400 F)
  2. prick the aubergines all over with a knife and place them directly over a gas fire or barbecue. Let them burn for about 8 minutes, turning them occasionally until the skins are well scorched and blistered.
  3. place the aubergines in a roasting tin and place it in the oven for about 30 min, until very soft. Let it cool
  4. split the aubergines open. The flesh inside should have the consistency of mashed bananas. Scoop the pulp into a blender and discard the skins. Blend it with all other ingredients.
  5. Taste and add more lemon or olive oil or garlic if needed. Serve with a generous drizzle of olive oil.

Coconut marshmallows (Maria-Mole)

HL_mariamole3

Children’s parties can be loud things. The ones I attended when I was growing up in Brazil were insane. Brazilians have a very sweet tooth. Very. We don’t go much for the hint, or suggestion of sugar in our desserts. We go the full hog.  Back in the 70s, with not a lot of thought given to ADD or E numbers, there was nothing standing between a birthday table covered in glucose and a pack of 7 year olds. The result was a bunch of crazed kids buzzing around in a collective sugar rush for hours, until the first inevitable crash came knocking down everyone else like dominoes. And we all went home sobbing and a bit bruised, ready for the next birthday do.

HL_mariamole8

One of the many treats I stuffed my face with in those parties was Maria-Mole. They’re not quite marshmallows, since there are no eggs in them, but it’s a similar texture, a little bit lighter, and covered in coconut. If you’re thinking of turkish delight, forget it. These are much more delicate, a bit more bouncy, and not  chewy or sticky. Before you know it, an entire tray of maria mole can go in 2 minutes. They’re the very definition of moreish.

In the true spirit of the 70s, you’ll find maria-mole in various pink colouring shades, or coated in a thin film of chocolate, or sometimes sprinkled with toasted peanuts. I suspect the  ones I had as a kid were out of a pre-mixed packet, with synthetic coconut flavouring. I like the white, unadulterated coconut version, and made my own here, dispensing with the help of Dr Oetker. You could use fresh coconut milk if you’re lucky enough to have them handy. I used coconut milk out of a tin.


And it worked a treat. Imagine biting into a coconut cloud. Made like this, maria-mole are definitely not a sickly children’s treat, and would make a very proud and grown-up appearance at any table. I served mine with coffee after Sunday lunch, and I wish I had some kids to blame for the mysterious disappearance of all maria-mole by the time I went to bed. With a slight ringing in my ears.

HL_mariamole2

Coconut marshmallows

(Maria-Mole)

  • 2 sachets of unflavoured powedered gelatine (20g)
  • 1 cup boiling water (200ml)
  • 1/2 cup cold water (10ml)
  • 2 tins coconut milk (800ml)
  • 2 cups caster sugar (320g)
  • shredded coconut
  1. Butter a baking tray that is at least 5 cm (2 in) deep and approximately 35cm X 25cm (14 X 10 in)
  2. Start with the coconut milk: empty both tins into a saucepan, bring it to the boil, then lower to a medium heat and let it cook until it’s reduced to 1/2 cup (100ml) – about 30 minutes. You can use it straight away and don’t need to wait for it to cool down.
  3. In a small bowl, dissolve the gelatine in the 1/2 cup boiling water, stirring all the time until there are no grains left. Transfer it to the large mixing bowl of an electric mixer.
  4. Add the reduced coconut milk, cold water, and sugar. Start the mixer in the lowest speed, and gradually raise it to the highest. Do this carefully, as the liquid will splash a lot to start with. It’s a good idea to shield the bowl with a tea towel. Or just wear a big old apron like I did. Continue to mix until it thickens to a texture similar to stiff egg whites and the volume at least doubles up. This should take about 10 to 15 minutes.
  5. Pour the mixture into the buttered baking tray, and leave it in the fridge for at least 4 hours until it’s firmed up. They’re quite easy to handle after that.
  6. Cut the marshmallows into small squares and coat them in shredded coconut.

HL_mariamole4

Midweek dinners, mother recipes and a passion for anchovies

Ah, the lure of the thrifty eating!

I suspect I’m not alone in deriving an enormous amount of pleasure from building an entire meal out of leftovers. I’m reasonably sure I’ve lived through some serious famine in a previous life. My inability to throw food away, often verging on borderline petri dish territory, may also have its roots in my upbringing: how my mother loved to repeat the mantra of  ‘you never lived through a war!’. Now, there are so many holes in that statement, it’s difficult to see where to start, really. Let’s see. My mother is a product of post-war Italy, and left for a better life in the tropics as a young child. And I also happen to have met her own mother, who’s capable of spending hours on end over a stove to make sure everyone gets exactly what they want to eat. The notion of a starved childhood fighting for scraps of polenta and sheltering from snow tempests is one she clearly only knows from the melodramatic Italian children’s literature that she herself read to me! In any case, the concept stuck and I don’t like throwing food away. To the extend that I will find myself in an endless cycle of buying a bit of feta just to fit in with that pie made of scraps, but then end up with leftover cheese and buy something else to go with it, and I’m forever trapped.

HL_cuore

Going from mothers to husbands, mine is vegetarian, and, as much as I care for the man, that sort of behaviour can be a challenge on occasion. Currently, having a freezer stuffed with 2 pork loins, a kilo of tilapias and some packs of bacon even I could not manage on my own,  it is tempting to smuggle some animal protein in a veggie curry and get it over with. Last night, I decided to tackle the fridge, abandoned after a week away with work, and crying out for some clearing out. This is what I made:

IMG_3094

The aforementioned grandmother used to fry potatoes in oil and rosemary, and I don’t know if this particular detail was on purpose or not, but the crispy bits of potato stuck to the bottom of the pan were always my favourite. For me, potatoes made this way beat any results you can get from an oven. Cut the potatoes quite thinly and arrange them in 2 or 3 layers in a deep frying pan, then cover them in nice olive oil. I added to that: smoked paprika, black olives, rosemary, thyme, salt and pepper. And since the resident vegetarian insisted on having dinner too, towards the end of cooking time, I split the portion between 2 pans, adding anchovies to mine and a couple of eggs to his. The eggs cooked gently and ended with a runny yolk, which immediately took the taste and colour of the paprika. The anchovies melted beautifully into the oil, producing a rich and velvety sauce to coat the potatoes and bring a contented smile to my face.

IMG_3098

And then I tackled the suspicious looking tomatoes: panzanella, or stale bread and tomato salad, really is such a simple solution to mankin problems. The only trick here is to prepare the salad not more than 15 minutes before you’re planning to eat it, so the bread doesn’t get too soggy.

IMG_3099

A last minute update: just before posting this, I found an abandoned aubergine in the bottom drawer of the fridge, and that went with the leftover olive oil from the previous night’s potatoes, some fava beans, and the lot into a cous cous.

And now we move to the freezer.

IMG_3101

Smokey potatoes in olive oil and anchovies

Add other ingredients you may have lying around that go well with the potatoes. The one thing not to compromise here is the quality of the olive oil. Use the nicest you have.

Ingredients:

  • 4 medium potatoes. I used Maris Piper
  • enough extra virgin olive oil to fill about 2 inches (5 cm) of a deep saute’ pan
  • a handful of black olives
  • 1 tbsp smoked paprika
  • a few sprigs of rosemary and thyme
  • salt, black pepper
  • 5 salted anchovies fillets

Peel the potatoes and cut them into approximately 1 cm (just under 0.5 in) slices

Fill a deep saute’ or frying pan with plenty of extra virgin olive oil and warm it in a medium heat, but not too much as to become smoky.

Add the potatoes, forming a tidy layer to cover the bottom of the pan.

Sprinkle some salt and pepper, smoked paprika, then place a couple of springs of rosemary and thyme.

Add a second layer of potatoes and continue with the same ingredients until you used all the potatoes. Up to 3 layers will cook well. Any more, and you’ll end up with burned potatoes and the bottom and uncooked ones in the middle.

Set the eat to lowr, cover the pan and let it cook for 15 to 20 minutes.

Towards the end, when the potatoes are almost tender, add the anchovies. Push a few of them towards the bottom of the pan. They will melt quickly and mix with the olive oil and paprika sauce. Leave the rest of the anchovies on the top of the potatoes.

Cover the pan again, cook for a further 5 minutes, and it’s ready.

Eat with crusty bread to mop up the juices.

Vegetarian version:

Replace the anchovies by 2 eggs. Carefully make a small nest by shifting a few potatoes to the side, and gently break an egg into it. To the same again with the other egg, then cook for only 2 to 3 minutes, so the yolks remain runny.

Green Door Supper club news!

A little while ago, I promised to bring some exciting news to you. So, here’s what’s been going on:

–         CatfordCanteen To start with, not quite breaking news, but it’s never too much to say it: the next Green Door supper club is happening this Saturday! That’s the 23rd November. At the brand new, über cool Catford Canteen! We’re working very hard to deliver an evening to make Catfordites proud. There’s still a chance to book at GrubClub. The menu will be very similar to the last supper club we did in Hither Green, with rich, comforting Northern Italian food – which should feel like a hug under the arctic weather we’re expecting this weekend. If you’re undecided about coming, I have 3 words for you: home made nutella. See you there!

–          Now the really, really exciting bit: the Hither Green Christmas market is coming back with a bang this year, and the Green Door will be there, apron and whisk at the ready! It is now official: we will be serving the finest porchetta sandwiches all day on the 7th December at the F.U.S.S Christmas market. I am very excited about this, and the variety of stalls – food and drink and crafts and more – and entertainment will make for the happiest welcome for the man himself – yes, DJ Father Christmas will be in the house!

Poster 2013 FUSS

–          If you haven’t seen this yet, the lovely folk at the Never Eat Wobbly Jelly blog wrote a very generous review of our October supper club . You can learn more about our food, and since you’re there, stop to look at other great stories, and some seriously good food finds. Their photos of Sicily make me want to pack my Sophia Loren sunglasses and fly.

 So there you have it. A lot of cooking, the new exciting Catford Canteen, and your Christmas shopping sorted with a day of mulled wine, choirs and roast pork in Hither Green. To paraphrase Gregg Wallace, winter doesn’t get happier than that!

xx

HL_eggs

Gnocchetti sardi

HL_gnocchi_sardi_broccoli

Malloreddus, or gnocchi sardi

Complete the sentence: Making your own pasta is _____:

a) therapeutic

b) messy

c) overrated

d) such a palaver

e) well worth the effort

Yes, the correct answer is indeed E. And since very recently, I’d also add: surprisingly quick and easy, mess-free and of such obvious superior quality.

HL_gnocchi-sardi_raw

As much as I enjoy making pasta, I’ve never been too confident about it, and it does tend to turn my kitchen upside down, with flour everywhere and pasta drying out on every surface. I’m a bit better with egg-based ones, although it puts me off, as you need to be ever so careful for it not to stick or break.

HL_Oliena_gnocchetti_sardiMy recent 2 weeks stint in Sardinia, and an almost daily encounter with their omnipresent gnocchetti – or malloreddus, as they’re called locally – , set the tone for a new pasta challenge. And they turned out to be such a pleasure to make and cook that I think I may have found my new best pasta friend.

Unlike their more famous potato cousins, the gnocchi sardi  are made with just durum wheat flour and water. They’re also bite sized, or even smaller if we’re talking of gnocchetti. Their shape is similar to an almost closed shell, a bit similar to  conchiglie. The shape, along with the groovy surface, make them a most welcoming host to rich tomato sauce – with which is very commonly served. In their special ‘Sunday clothes’,  gnocchi sardi have added saffron in the dough for the beautiful colour and flavour.

I didn’t want the heartbreak of facing our aneamic tomatoes after a fortnight in Southern Italian tomato sauce heaven, so I went with broccoli and garlic. It is a scientifically proven fact that adding any dark green and garlic to a dish immediately increases its chances of being a success by 75%.

As for the flour, I used remilled durum wheat semolina (or farina di semola rimacinata, if you’re looking for it in Italian delis). This is more refined than normal semolina flour, and after a bit of research, I found opinions on both sides: the remilled version is ideal for pasta making for its fineness; or you should stick to the normal durum wheat for better quality and bite. I found it easier to work with than the other semolina flour I normally use , and we had just perfectly al dente pasta for dinner. I’ll be going back for more.

Gnocchetti sardi with broccoli and garlic

I used a small wooden gnocchi board, also called ‘chitarrina’ (small guitar) with grooves on it to shape my gnocchi. You could also use the tines of a small fork.

For the pasta:

  • 500g remilled durum wheat flour
  • 250 ml very warm water

For the sauce:

  • a small head of broccoli.  Or, if available, broccoli florets, as they’re delicious on pasta
  • 2 cloves of garlic, finely chopped – or more, according to taste
  • the nicest extra virgin olive oil you can get your hands on
  • salt and black pepper

Make the pasta:

  1. place the flour in a large bowl and make a well in the centre
  2. gradually add the warm water to the centre and, using your fingers,  start mixing the flour from the sides until it’s all incorporated and you have a uniform dough. Yes, the water is very hot, but as soon as it mixes with the flour the temperature drops and you won’t burn your fingers. Just be careful when you first pour the water.
  3. turn the dough out onto your work surface. Mine is wood and I did not need to flour it
  4. knead well, and with vigour!  Approximately 15 minutes, until the dough is soft, silky and elastic
  5. form the dough into a ball and let it rest for 30 minutes
  6. cut a small portion out of the dough and roll it into a snake like shape of approximately 0.5 cm of diametre
  7. with a sharp knife, cut 1 cm round pieces of dough
  8. now, grab a piece and roll it against the gnocchi board/fork tine. Press it firmly against the board and roll the gnocchi down (see photo). It will curl over itself, and pick up the groves from the board.

Prepare the sauce:

1. separate the broccoli into florets and steam them for 3 to 4 minutes, until it’s tender, but still very al dente. I do this by placing a colander over a saucepan with simmering water, and cover the colander.

2. remove the broccoli from the steam and chop it into very small pieces.

3. warm a good amount of olive oil (about half a cup) in a large frying pan and add the chopped garlic on medium heat. Do not let it brown. As soon as it starts getting yellow-golden, add the broccoli and mix well so it’s all well coated with the oil. Keep the heat to a medium and cook for about 3 minutes. Add salt and black pepper to taste.

Bring it all together:

1. boil abundant water in a large saucepan. Add salt

2. throw the gnocchi in. It is ready as soon as it comes to the surface. Mine took no longer than 3 minutes

3. if you have big enough a frying pan, keep the warm broccoli in it and add the drained gnocchi to the pan as soon as they come come out of the boiling water. Mix it well and warm it for less than a minute. Otherwise, transfer the cooked gnocchi to a large serving dish, and mix the warm broccoli.

4. Serve with grated pecorino.

HL_gnocchi_sardi_broccoli1

Eating Fish in Alghero. And a recipe for stuffed squid

HL_Alghero_fisherman

Warning: this blog post contains clichéd images of stereotypical Italian holidays. Sorry, I couldn’t help it.

If I had to describe Sardinia in one word, I’d choose stunning. But since I can be as verbose as I wish (I’ve been quiet for ages!) I’ll also go with warm, incredibly varied, exotic, funny, intriguing and unforgettable.

Having mostly lived in enormous cities, I’m always surprised to find myself in fully working cities that are also manageable on foot. Alghero has 40 thousand people living by the sea (I am told this number goes up to 4 times as much in summer), and the Mediterranean is right there. You can smell it and see it from anywhere in town.  It was really my civic duty to get to know their sea food properly. Luckily, our flat was just down the road from the daily fish market, which made the task less arduous. Inside the market, I ate at what is probably the restaurant with the fewest overheads in history: fresh fish from 5 minutes away, fried or barbecued. And a choice of local cold white wine.

I’m not sure if I was more excited about the market or the restaurant itself. They’re both outstanding. We spotted the Boqueria restaurant – more on that surprising Spanish influence on Alghero to come –  early on a Saturday and felt very smug for having discovered such a hidden gem – only to be told to book immediately for any chance of getting a table that day. By early afternoon, the place was packed. As it so often happens in Italy, I went with what the waitress told me to, and received a plate with king prawns, squid, and a magnificent bream (orata) cooked in a crust of salt. Simply barbecued with nothing more than salt, it was all delicious, but the orata was the star of the show. The thick layer of salt kept the sweet flesh from direct heat, resulting in a moist, tender, delicate meat that held well as you picked it up, only to melt in your mouth a second later. Washed down with a bottle of prosecco, that sent me straight to a very happy holiday afternoon nap. Unfortunately, the Resident Vegetarian had to supplement his lunch with a cheese sandwich. This was the non-meat item on the menu:

HL_Alghero_boqueria_salad

Vegetarian fish feast.

Vegetarian menu shortcomings aside, that meal was one of the highlights of the week, and the market on Via Cagliari a stop I’d recommend to anyone visiting Alghero.

HL_Alghero_boqueria_squid

As for the city itself, it was full of surprises. This was my first time in Sardinia, and I wasn’t sure what to expect from Alghero. The image I had from Sardinia was exclusive beaches, remote Berlusconi villas, and intimidating millionaire tourists on dubious yacht parties. What I found on our first stop was a beautiful, lively city that has a life outside the tourism industry, although it clearly makes the best of the summer months too. I didn’t see any obvious millionaires, but I met a lot of fishermen.

The walled historic centre is reasonably well preserved, while the town that has developed around it is well planned and green, and the local beaches clean, accessible and gorgeous.  Alghero was populated by Catalan settlers from the 14th century, and in its eventful history has had both Catalan and Spanish as the official language, before it went back to Italian rule in the early 1800s –  well, it was then really the House of Savoy before the Italian unification, but that country has way too complicated a history for this blog. My point is, the Catalans have left a strong mark, and the local dialect heard in the streets, along with the unique architecture and local food makes the place feel very Spanish. There is a local version of paella (same name) made with the Sardinian fregola pasta; crème catalan is a ubiquitous dessert, and food names such as seadas sound decidedly  un-Italian. And speaking of seadas: thinly rolled-out dough made into a large pasty, filled with fresh sweet cheese and deep fried. What can I say? Seadas are usually served with drizzled honey (I found they have an adoration of honey all over Sardinia, with menus specifying which varieties you can have: from strawberry tree honey, to rosemary, eucalyptus and chestnut), or sugar. It is an amazing dessert. Available everywhere I went, always freshly made. I had mine with sugar.

HL_Alghero11

Back at the market, being left alone in that fish Disneyland for 5 minutes, I of course could not resist buying some squid and sardines, and since I was there, some Sardinian buffalo mozzarela smuggled amongst all the seafare. The mozzarella was firmer and saltier than the better known one from Campania, but still very good. We had a lovely flat with a roof terrace overlooking other terraces and gardens that looked much more tropical than Mediterranean: I had breakfast over banana trees, pomegranate and sharon fruit. Determined to use as many Sardinian ingredients as I could manage, I used the sardines with pan carasau and herbs to make a stuffing for the squid. I then barely grilled the squid just to get a bit of a smokey flavour in them, and cooked them in Vermentino white wine. To go with the squid: green fried tomatoes, the breadcrumbs crust also made with pan carasau. I am fully aware of how touristy this is, but is there anything better than a quick food shopping spree in an Italian market for a delicious, fresh and easy dinner?

A note on the bread: pan carasau is a Sardinian bread religion, and I was given a few lectures during the holiday on just why this is obviously the best and most versatile bread in the world. Of Italians I admire the passion for food, and the modesty. I must admit that I never ‘got’ pan carasau before. It is very thin, crispy, and I didn’t quite understand what to do with bread you can’t mop food with. A fortnight in Sardinia has converted me, and the stuff really is delicious.

Alghero had enough going on for a full weeks’ stay. The beaches were far above my expectations, and you would be happy if all you’re looking for is a beach break right in the middle of autumn. All it takes is a 10 minute bike ride (through pine trees!) to reach a stunning sandy beach – Pineta –  almost deserted, despite the temperatures of over 25C and warm waters in late October. Walking through the beach in town, the scenery is very rugged and really wild, like nothing I’ve seen elsewhere in continental Italy. There are lots of other beautiful beach destinations, all under 10 miles away – Capocaccia being a highly recommended one, although we didn’t make it that far.

But Sardinia really is as varied as you’ll be told by any tourist brochure. We then headed to the mountains and found a whole other world, of which I’ll talk in another post. For now, I’ll keep looking at my photos and wishing I could pop round the fish market for a quick oyster feast.

Other highlights of the week in Alghero:

  • casa del formaggio algheroCasa Del Formaggio: Via Mazzini, 43. We were treated to a sampling of pecorino by age: from 6 to 12 months, accompanied by full explanation of origin and production of each cheese by the passionate and deeply knowledgeable owner/shopkeeper.
  • Our flat: through the wonder that is airbnb, we found this gem in central Alghero. The landlady, Giovanna, picked us up from the airport, gave us a city tour on the way home, and even baked us cookies! She lives in the flat downstairs with her family and my new Algherese best friend, Pongo the dog. And best of all, the flat has this dream of a pasta making table! Which I will from now on include in every birthday and Christmas wish list until I get one. A perfect base from which to explore the town, and a reminder of how shortsighted and petty New York’s attack on airbnb is.  Long live airbnb and the benefits it brings to tourists, landlords and any city.
  • Sardinian vermentino wine.
  • Sword fish. This is my all-time favourite fish, and I tend to go crazy on it during trips to Italy, since it’s a popular fish there. At La Botteghina (Via Principe Umberto, 63), they had a sword fish carpaccio that was out of this world. Have it.
  • Al Refettorio: Vicolo Adami, 47. Again, beautifully fresh swordfish cooked with capers. And a dessert I ate so quickly and so avidly the waiter asked if I’d like a second one. It was: a pistachio fondant with a warm almond and pistachio filling. Get out of here!

A special note of thanks to Luigi from Capo Caccia Foods in London, who generously shared his insider tips on his hometown of Alghero before we went – and who, bizarrely, we bumped into while there! If you’d like to try Sardinian food before you venture there, a visit to Capo Caccia will make you book your tickets in a minute.

Squid stuffed with sardines cooked in wine

I wanted to use local Sardinian ingredients for my dinner, although many of the ingredients here can be replaced. The pan carasau can be replaced by any bread. Just adjust the quantities, as the bread is there only to give some consistency to the filling. Don’t make it to doughy.

This recipe serves 2.

  • 4 whole squid, cleaned, cartilage removed.
  • 2 sardines, cleaned, gutted and roughly chopped
  • 1/4 small fennel, chopped. Include the leaves, also chopped
  • 1 small red pepper, chopped
  • a few capers
  • a handful of chopped parsley
  • 2 chopped spring onions
  • half an onion, thinly chopped
  • olive oil
  • 2 slices of pan carasau
  • zest of 1 lemon
  • 3 tbsp tomato sauce
  • 1 cup of white wine
  • salt and pepper to taste

Make the filling:

  1. cut off the squid tentacles and chop them.
  2. break the pan carasau into rough pieces into a small bowl and cover it with water and the tomato sauce. Mix it all and let the bread to soak while you prepare the sardines.
  3. fry the spring onions in 3 tbsp of oil. Add the peppers and fennel and cook for 2 to 3 minutes until tender. Add the sardines, the tentacles, some salt and pepper and cook for about 3 minutes on medium heat until the sardines are done.
  4. squeeze the bread to drain off the liquid and transfer it to a separate bowl. Add the prepared sardines, the lemon zest, capers, salt and pepper, and mix it well to form a paste.

Prepare the squid:

  1. stuff the squid with the sardine filling. Secure each squid with a toothpick.
  2. heat up a griddle pan and cook the squid on the highest heat for just about half a minute on each side, only enough to get a bit of colour and a smokey flavour.
  3. on a deep saute’/frying pan, fry the chopped onions in about 3 tbsp of olive oil until translucent. Add the squid, cook it for a couple of minutes, and cover it with the wine. Cover and cook on a medium heat for about 10 minutes, until the liquid has almost entirely evaporated.

HL_Alghero_squid